
Desserts
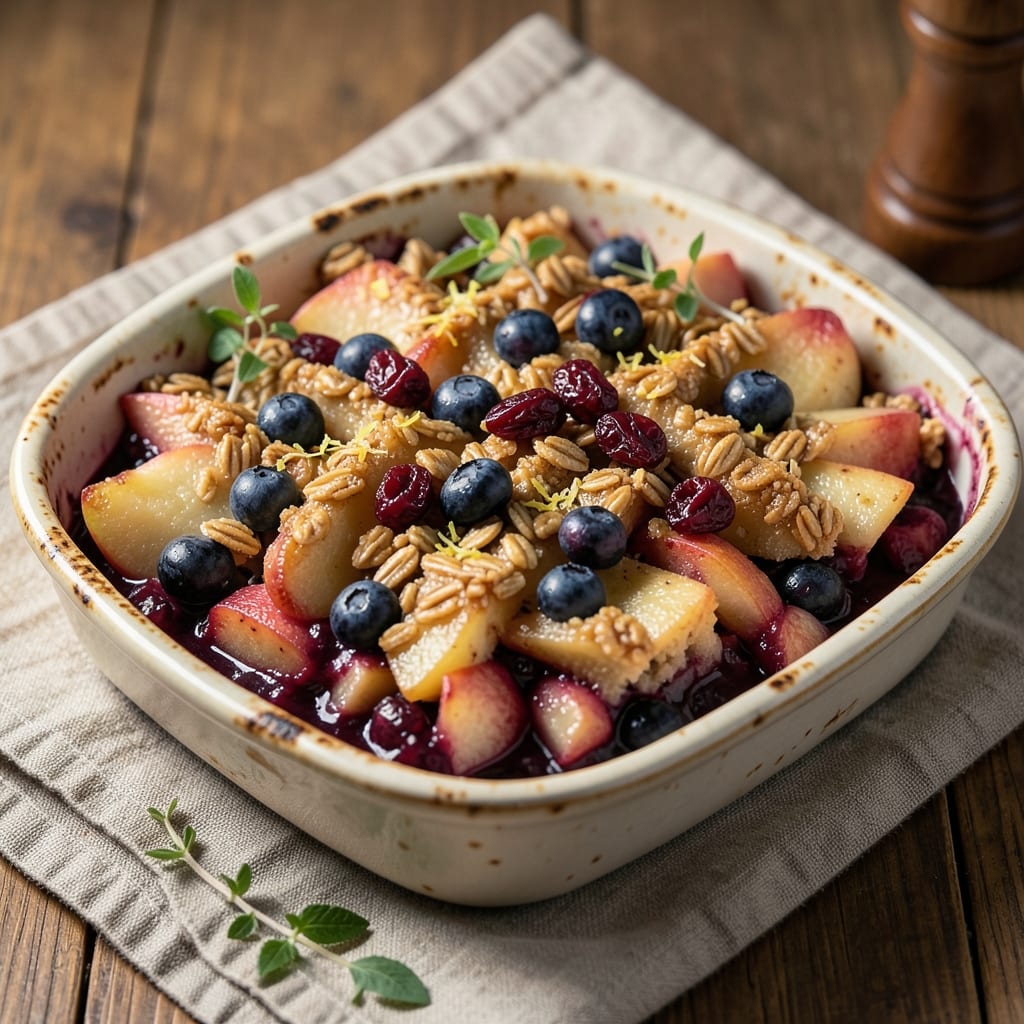
This apple blueberry cranberry crisp recipe delivers a perfect balance of tart berries and sweet apples, topped with a golden, crunchy oat streusel that's impossible to resist. 💛 The secret lies in layering the fruit just right—juicy apples and plump berries create a filling that stays tender while the topping transforms into crispy, caramelized perfection.
What sets this crisp apart is the way the flavors develop during baking. Tart cranberries and sweet blueberries mingle with spiced apples, creating a filling that's both vibrant and complex. The oat topping, with its cinnamon and brown sugar notes, adds a satisfying crunch that contrasts beautifully with the soft fruit below.
By the time it emerges from the oven, you'll have a dessert that's warm, aromatic, and ready to be served with a scoop of vanilla ice cream or a dollop of whipped cream. The aroma alone will have everyone gathering around the table, and the first bite delivers that perfect combination of tart, sweet, and crunchy.
Whether you're hosting a gathering or simply craving a comforting dessert, this crisp comes together in one bowl and bakes to golden perfection. The best part? It's easily adaptable—swap in gluten-free oats for a dietary-friendly version that doesn't compromise on flavor. Let's get baking!
Ingredients for apple blueberry cranberry crisp
Tart berries meet sweet apples under a golden, buttery oat topping—just 13 ingredients for pure comfort.
| Ingredient | Amount | Notes |
|---|---|---|
| Honeycrisp Apples 🍎 | 4 medium | Peeled, sliced into 1/4-inch pieces |
| Fresh Blueberries 🫐 | 1 ½ cups | Washed, no need to drain |
| Dried Cranberries 🍇 | 1 cup | Chopped if large, plump variety |
| Granulated Sugar 🍚 | ¾ cup | For fruit mixture |
| Lemon Juice 🍋 | 2 tbsp | Freshly squeezed |
| Cinnamon 🌿 | 1 tsp | Ground, for fruit mixture |
| Old-Fashioned Rolled Oats 🌾 | 2 cups | Not quick oats |
| All-Purpose Flour 🌾 | ½ cup | For topping |
| Light Brown Sugar 🍚 | ½ cup | Packed, for topping |
| Ground Cinnamon 🌿 | 1 tbsp | For topping |
| Salt 🧂 | ½ tsp | Fine grain |
| Unsalted Butter 🧈 | ¾ cup | Cold, cubed |
| Vanilla Extract 💧 | 1 tsp | Pure vanilla |
The apples are everything here. Honeycrisp is ideal—crisp, sweet, and holds up during baking—but Gala or Fuji work too. Grab them at Whole Foods or your local grocery store's produce section. Look for firm apples with no bruises. Blueberries should be plump and deep blue, not shriveled. Cranberries? Dried, not fresh—they keep their tart punch. The secret to the perfect filling is tossing everything together right before baking so the berries stay juicy, not mushy. I always use Trader Joe's dried cranberries—they're sweetened just enough to balance the tartness.
No Honeycrisp apples? Gala or Pink Lady are great substitutes. Blueberries frozen and thawed work too (they'll release more juice, so drain well). The topping can go gluten-free—swap the all-purpose flour for gluten-free 1:1 baking flour. Want extra crunch? Add 1/4 cup chopped pecans or walnuts to the topping. The butter matters here—cold, cubed butter creates flaky layers. Don't skip the vanilla; it ties everything together. For a boozy twist, add 1 tbsp bourbon or brandy to the fruit mixture. And if you're watching sugar? Use coconut sugar in the topping—it's less processed and adds caramel notes.
This crisp tastes even better the next day—honestly, it's the best part. Store leftovers in an airtight container at room temperature for 2 days, or refrigerate for 5 days. For freezing, wrap tightly in plastic and freeze for up to 3 months. Reheat individual portions in the microwave for 30 seconds or bake at 350°F for 10 minutes to revive the crunch. I always make a double batch—one for dinner, one to freeze for lazy weeknights. The topping keeps separately in the fridge for 3 days if you want to prep ahead.
Why You'll Love This Recipe
- No-Core Chopping Needed: I swear by Honeycrisp apples for this—tender, juicy, and they hold their shape perfectly when sliced. Toss them in a bowl with blueberries and cranberries, drizzle with lemon juice, and stir. That’s it. No peeling, no fuss, no tiny knife wounds from stubborn apple cores.
- Triple-Fruit Magic: Between us, this combo is ridiculously good—sweet-tart apples, juicy blueberries bursting with every bite, and those dried cranberries adding chewy contrast. The lemon juice? It’s the secret that makes the whole thing bright and fresh, like autumn in a bowl.
- Weeknight or Holiday Hero: Make a double batch on Sunday and reheat portions all week—it’s my go-to for breakfast, dessert, or even a fancy brunch. Serve it warm with vanilla ice cream at Thanksgiving, or grab a container straight from the fridge for a lazy Monday morning. Honestly, it never disappoints.
- Leftovers That Beg for More: This crisp reheats like a dream—just 10 minutes in the oven or microwave—and tastes just as good the second day. Plus, it’s budget-friendly: dried cranberries and Honeycrisp apples stretch far, so you’re not scrambling for last-minute grocery runs. My kids even ask for it over store-bought treats.
Step-by-step instructions for apple blueberry cranberry crisp
This crisp delivers a perfect balance of tart berries and sweet apples with a buttery, crunchy topping every time.
🍳 Step 1: Toss and Simmer the Fruit Filling
In a large bowl, combine the 4 medium Honeycrisp Apples (peeled and sliced), 1.5 cups Fresh Blueberries, 1 cup Dried Cranberries, 0.75 cup Granulated Sugar, 2 tbsp Lemon Juice, and 1 tsp Cinnamon. Gently stir until the berries are evenly distributed and the apples are lightly coated with sugar.
Transfer the mixture to a 9x9-inch baking dish and spread it into an even layer. Here's the thing—don't press down on the fruit. You want the berries to stay plump and juicy, not mashed. Cover the dish with plastic wrap and let it sit at room temperature for 15 minutes while you prepare the topping. This resting time helps the flavors meld and prevents a soggy bottom.
👨🍳 Step 2: Mix the Crisp Topping
In a separate bowl, combine the 2 cups Old-Fashioned Rolled Oats, 0.5 cup All-Purpose Flour, 0.5 cup Light Brown Sugar, 1 tbsp Ground Cinnamon, and 0.5 tsp Salt. Mix with a spoon or your fingers until everything is evenly distributed—you want no dry spots of flour or sugar.
Cut the 0.75 cup Unsalted Butter (cold and cubed) into the dry mixture using a pastry cutter or your fingers. Work quickly but gently to create pea-sized butter pieces throughout. The butter should be cold enough to hold its shape but soft enough to mix in. Sprinkle in the 1 tsp Vanilla Extract and toss again until fully incorporated. This is where the magic happens—the cold butter will create those irresistible pockets of crispy goodness when baked.
🥘 Step 3: Assemble and Bake the Crisp
Preheat your oven to 375°F while the fruit mixture rests. Remove the plastic wrap from the fruit and sprinkle the oat topping evenly over the top. Use your fingers to gently press down just enough to create a cohesive layer—you don't want to compact it too much or it'll lose its crunch.
Bake for 35-40 minutes until the topping is golden brown and the filling is bubbling around the edges. The center should still have some softness—it'll continue cooking as it rests. Here's the trick: If the topping starts browning too quickly, tent it loosely with aluminum foil to prevent burning while it finishes cooking.
⏰ Step 4: Rest and Serve Warm
Remove the crisp from the oven and let it cool for 10-15 minutes before serving. This resting time is crucial—it allows the juices to redistribute and the topping to set properly. Serve warm with a scoop of vanilla ice cream or a dollop of whipped cream for the ultimate experience.
Here's what you're aiming for: tender, juicy apples and berries with a crispy, caramelized topping that crunches perfectly. If you want to get fancy, dust the top with a little extra cinnamon or serve with a side of Greek yogurt. The flavors will be even better the next day, but trust me—it won't last that long!
Pro Tips For Making Apple Blueberry Cranberry Crisp
- Prep Apples Fast: Cut Honeycrisp apples into ½-inch chunks while they’re still cold—no soggy mess. Toss them immediately in lemon juice (about 1 tablespoon) to keep the color bright and prevent browning while you measure out the blueberries and cranberries.
- Skip the Soggy Bottom: After tossing the fruit with sugar, spread it evenly in the baking dish—no thick clumps. Press the dried cranberries lightly into the mix so they soften without sinking to the bottom and turning into a syrup swamp.
- Bake Until Golden: The topping needs 20-25 minutes at 350°F (375°F if you’re impatient) to get that deep caramel color. Resist peeking—every time you open the oven, the steam makes it gummy instead of crisp.
- Toast the Oats: Pulse rolled oats in a food processor for 10 seconds before mixing with butter and brown sugar—this gives the topping a nutty depth. (No food processor? Spread them on a baking sheet for 5 minutes at 350°F first.)
Storing and reheating this dish
Room-Temp Storage
This crisp tastes best when served warm, but leftovers keep beautifully at room temperature for 2 days in an airtight container. The topping stays crispy longer this way, and the fruit flavors deepen overnight. I always store mine in a glass Pyrex dish with a tight lid—it keeps the moisture in and prevents sogginess. Just cover it loosely with plastic wrap first to let any excess steam escape. 💛
Fridge Preservation
For longer storage, refrigerate leftovers for up to 5 days in the same airtight container. The texture will change slightly—the topping softens a bit—but reheating restores that perfect crunch. I like to portion individual servings into ramekins before refrigerating so they're ready to grab and heat. Always let it cool completely before covering to prevent condensation.
Freezer-Friendly
Make this crisp ahead and freeze it for up to 3 months—it's perfect for lazy weeknights! Wrap the baked dish tightly in plastic wrap, then place it in a freezer bag with all the air squeezed out. When ready to eat, thaw overnight in the fridge, then reheat in the oven at 350°F for 10-15 minutes until warmed through. The topping might lose some crunch during freezing, but it comes back beautifully with reheating.
Topping Storage Tip
Make the oat topping separately and store it in the fridge for up to 3 days in an airtight container. This is great for meal prep—just assemble with fresh fruit when ready to bake. Keep the butter cold in the topping by storing it in the fridge until just before mixing. The topping can also be frozen for 1 month if you want to prep everything ahead of time.
Reheating Secrets
For microwave reheating, cover the crisp with a damp paper towel and heat on 50% power for 30-45 seconds until warm. This prevents drying out. For best results, I recommend oven reheating: cover loosely with foil and bake at 350°F for 10 minutes. This restores that golden crunch while keeping the fruit juicy. Add a splash of water to the baking dish if the topping looks dry.
Serving Suggestions
Serve warm crisp straight from the oven with a scoop of vanilla ice cream or a dollop of whipped cream. For a lighter option, try it with Greek yogurt or a drizzle of honey. The contrast of warm dessert with cold toppings is pure magic. If you've refrigerated it, let it sit at room temperature for 5 minutes before serving to revive the textures. 🍦
Nutrition facts
Frequently asked questions
Can I use frozen blueberries instead of fresh?
Frozen blueberries work perfectly—just thaw and drain them well to prevent excess moisture in the filling. For extra flavor, toss the thawed berries with 1 teaspoon lemon zest before adding them to the fruit mixture. This brightens up the tartness and keeps the texture juicy rather than mushy.
Why is my crisp topping soggy instead of crispy?
Soggy topping usually happens when the fruit releases too much juice before baking. To fix this, spread the fruit mixture in a thin, even layer and let it rest uncovered for 15 minutes before adding the topping. Also, make sure your butter is cold when mixing into the topping—this creates air pockets for crispiness. If it's already baked, sprinkle extra oats on top and broil for 2-3 minutes to restore crunch.
How do I make this gluten-free?
Swap the all-purpose flour for a 1:1 gluten-free baking flour and use certified gluten-free rolled oats. For extra binding power, add 1 tablespoon ground flaxseed or chia seeds to the topping mixture. The texture will still be delicious—just slightly denser. Always check labels to ensure all ingredients are certified gluten-free.
Can I bake this in a different-sized dish?
Yes! For a 8x8-inch dish, reduce baking time by 5-7 minutes (watch closely at 30 minutes). For a 9x13-inch dish, increase baking time by 5-10 minutes and tent with foil if browning too quickly. The key is adjusting for surface area—more spread means longer bake time. Always check doneness by looking for golden brown edges and bubbling filling.
What's the best way to reheat individual servings?
For single servings, microwave on 50% power for 20-30 seconds covered with a damp paper towel. For best texture, reheat in the oven: place slices on a baking sheet at 350°F for 5-7 minutes until warm and crispy. Add a splash of water to the baking dish if the topping seems dry—this helps restore moisture without making it soggy.